Customise columns
The Users list lets you choose which columns are visible. Your column selection is saved per school.
Before you start
- You must be an admin for the current school.
- Column settings are saved per school, so you can have different layouts for different schools.
Steps
Step 1: Open the Users page
Select Users in the left sidebar.
Step 2: Open column settings
Select Columns near the top right of the page (next to Add user).
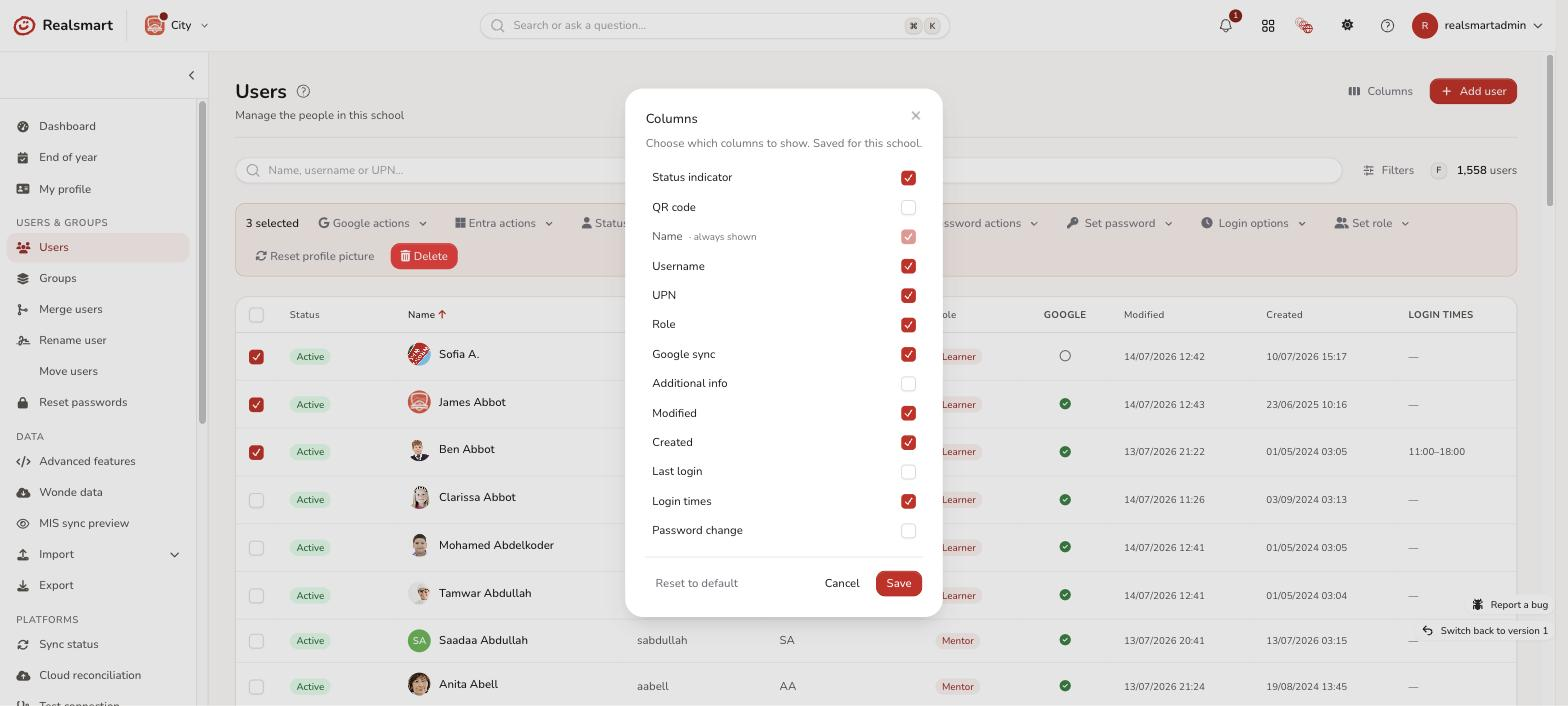
A panel slides open listing all available columns.
Step 3: Toggle columns
Tick or untick each column to show or hide it. Changes take effect immediately — the table updates as you tick.
Available columns:
| Column | What it shows |
|---|---|
| Status indicator | Coloured badge for the Status field (Active / Suspended / Locked / Deleted — see User statuses), plus a separate lock icon for Protected (Smartsync off) and an hourglass icon for Pending suspension |
| QR code | Whether a QR login code exists — see QR code login |
| Name | Full name and avatar. Always shown — the name is the link to open a user's edit page, so it can't be hidden. |
| Username | The user's username |
| UPN | Microsoft User Principal Name |
| Role | Admin / Mentor / Learner / Observer / Governor / Ofsted |
| Google sync | Whether the account is synced to Google Workspace |
| Additional info | Extra metadata field |
| Modified | Date last edited |
| Created | Date created |
| Last login | When the user last logged in |
| Login times | Number of logins |
| Password change | Whether this user's password change/reset ability is locked, at a glance — without opening each user individually |
Step 4: Close the panel
Select anywhere outside the panel, or select Columns again, to close it. Your selection is saved automatically.
Result
The Users list shows only the columns you selected. The setting is saved for this school and persists across page loads.
Related
Did this work for you?
If a step looked different on your site, tell us and we'll update the screenshots.
Thanks for your feedback.