Export data
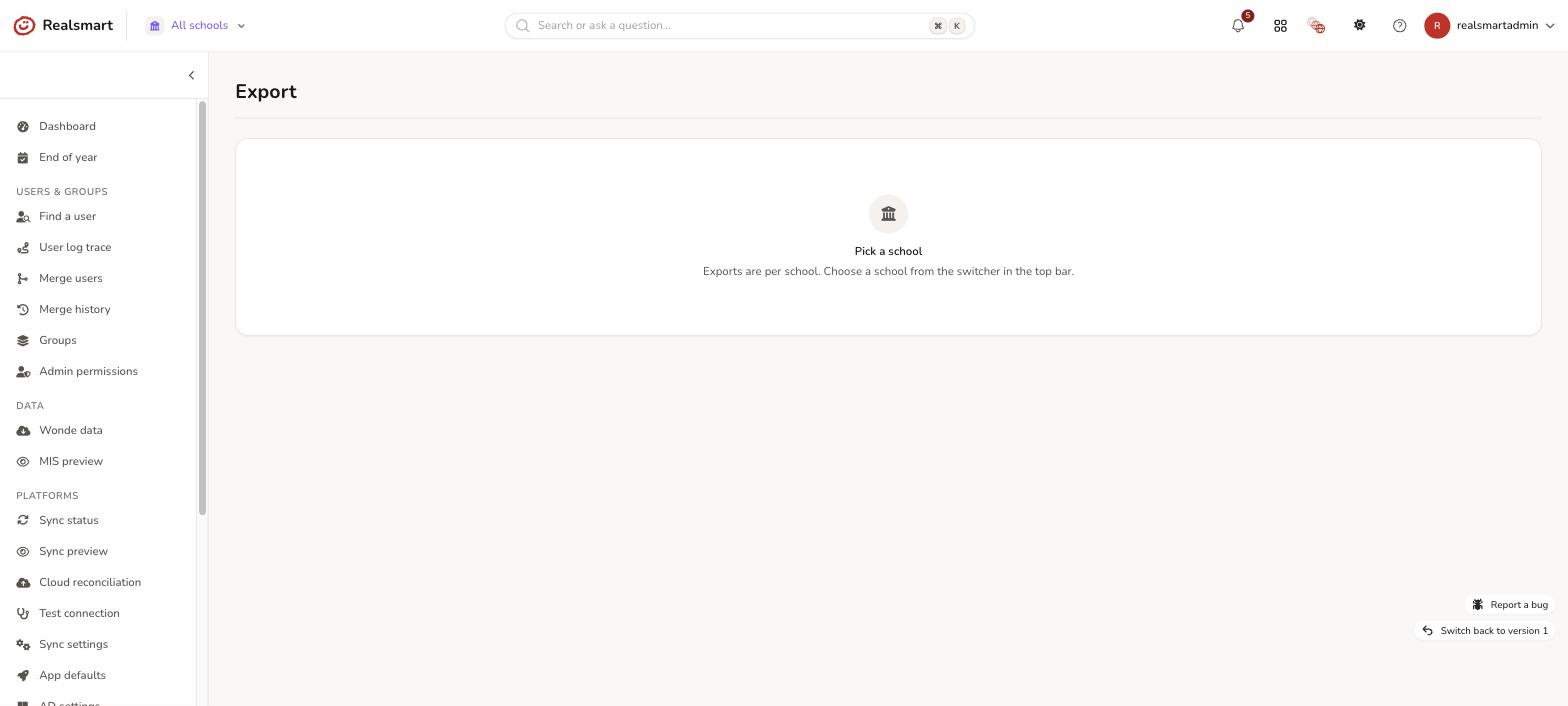
The Export page (sidebar → Data → Export) holds a set of one-click downloads for the school you're currently viewing, plus Student logins by registration group — the one export you choose what goes into, for handing login details out to students.
Before you start
- You need the data-export permission for the school.
- Export is per school. Switch to the school you want in the top-bar school switcher first. In MAT mode (All schools), the page shows a "Pick a school" prompt instead of any downloads — there is no trust-wide, cross-school export from this page.
What you can download
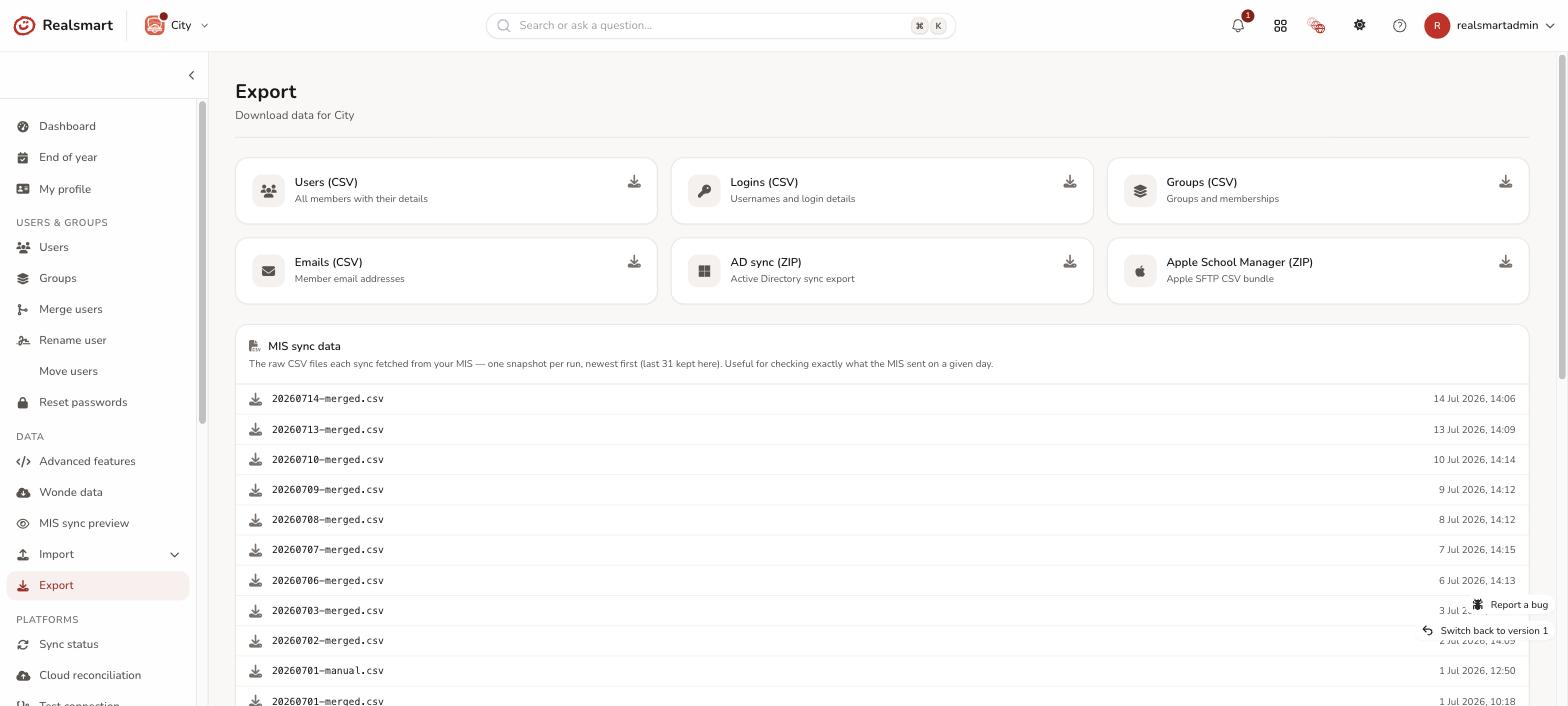
The tiles shown depend on what's enabled for the active school:
- Users (CSV) — every member with their details.
- Logins (CSV) — usernames and login details.
- Groups (CSV) — groups and their memberships.
- Emails (CSV) — member email addresses.
- AD sync (ZIP) — only shown if Active Directory sync is enabled for the school.
- Apple School Manager (ZIP) — only shown if Apple sync is enabled for the school (an SFTP-format CSV bundle).
Below the tiles is Student logins by registration group, which is not a one-click tile — see its own section below.
Steps
Step 1 — Open the Export page
Make sure the school you want is selected in the top-bar switcher, then select Export in the left sidebar (under Data).
Step 2 — Choose a download tile
Each tile is a direct download — there's no separate "type" or "filter" step. Select the tile for the data you want (e.g. Users (CSV)) and the file downloads straight away, opened in a new tab.
Result
The CSV (or ZIP, for AD sync / Apple School Manager) downloads to your device immediately — there's no intermediate preview or configuration screen.
Student logins by registration group
Use this when students need to be told their login details and you're giving them out through registration — a bundle per form tutor.
It lists every active learner with their username, first name, surname and registration group. Suspended learners are left out, because their account can't be logged into. Learners whose MIS sent no registration group are grouped together under No registration group so nobody is quietly dropped.
Passwords are not included. To set students' passwords and hand those out, use Reset passwords instead.
Step 3 — Choose the registration groups
Tick the groups you want. The number beside each is how many learners are in it, and the line beside the buttons totals up your selection. Leave every box clear to include all groups; once you've ticked some, Select all groups puts it back.
Step 4 — Take it as a CSV or print it
- Download CSV — one row per learner:
registration_group,username,first_name,surname, sorted by registration group and then surname. This is the file to use for a mail merge or to split up in a spreadsheet. - Print sheets — opens a print preview with one A4 page per registration group, each headed with the group name and listing name and username. Print it and the pack splits straight into a bundle per form tutor. Your browser must allow pop-ups for this site; if it blocks the window you'll get a warning telling you so.
Both are recorded in the audit trail, since they take pupil data out of the system.
MIS sync data
The same Export page also holds MIS sync data — the raw CSV snapshot the sync fetched from your MIS on each run, one file per sync, newest first (roughly the last month is kept). This is the exact data your MIS sent on that day, before any processing — useful when you need to check whether a discrepancy came from the source data or from the sync.
Scroll down to the MIS sync data list and select a file to download it as a CSV. You can only see and download your own school's snapshots, and each download is recorded in the audit trail (these files contain pupil and staff MIS data).
Related
Was this guide helpful?
We read every response — it decides what we rewrite next.
Thanks for your feedback.