All guides / Content-publishing
Smart Notices
Overview
Smart Notices creates short, eye-catching notices — like sticky notes on a board — and displays them automatically on your homepage, or on any page or category archive you choose to switch them on for. They suit quick reminders, celebration messages, or short-lived announcements that do not need a full news post.
Each notice is its own piece of content with a title, body text, and (optionally) an excerpt. You control how many appear, how they are laid out, and where they show.
Getting set up
Step 1: Check Smart Notices is switched on
Look for Smart Notices in the WordPress sidebar. If it is there, go straight to Step 2.
Smart Notices is a separate plugin rather than one of the features on the Smart Plugins dashboard, so on a site that has never used it the menu is missing. Go to Plugins in the sidebar, find Smart Notices in the list, and select Activate underneath it. The Smart Notices menu appears straight away.
If you cannot see Plugins in the sidebar, your account does not manage plugins — ask Realsmart support to switch it on for you.
Step 2: Add your first notice
Go to Smart Notices → Add New Notice in the WordPress sidebar. Give it a title and write the notice text, then publish it.
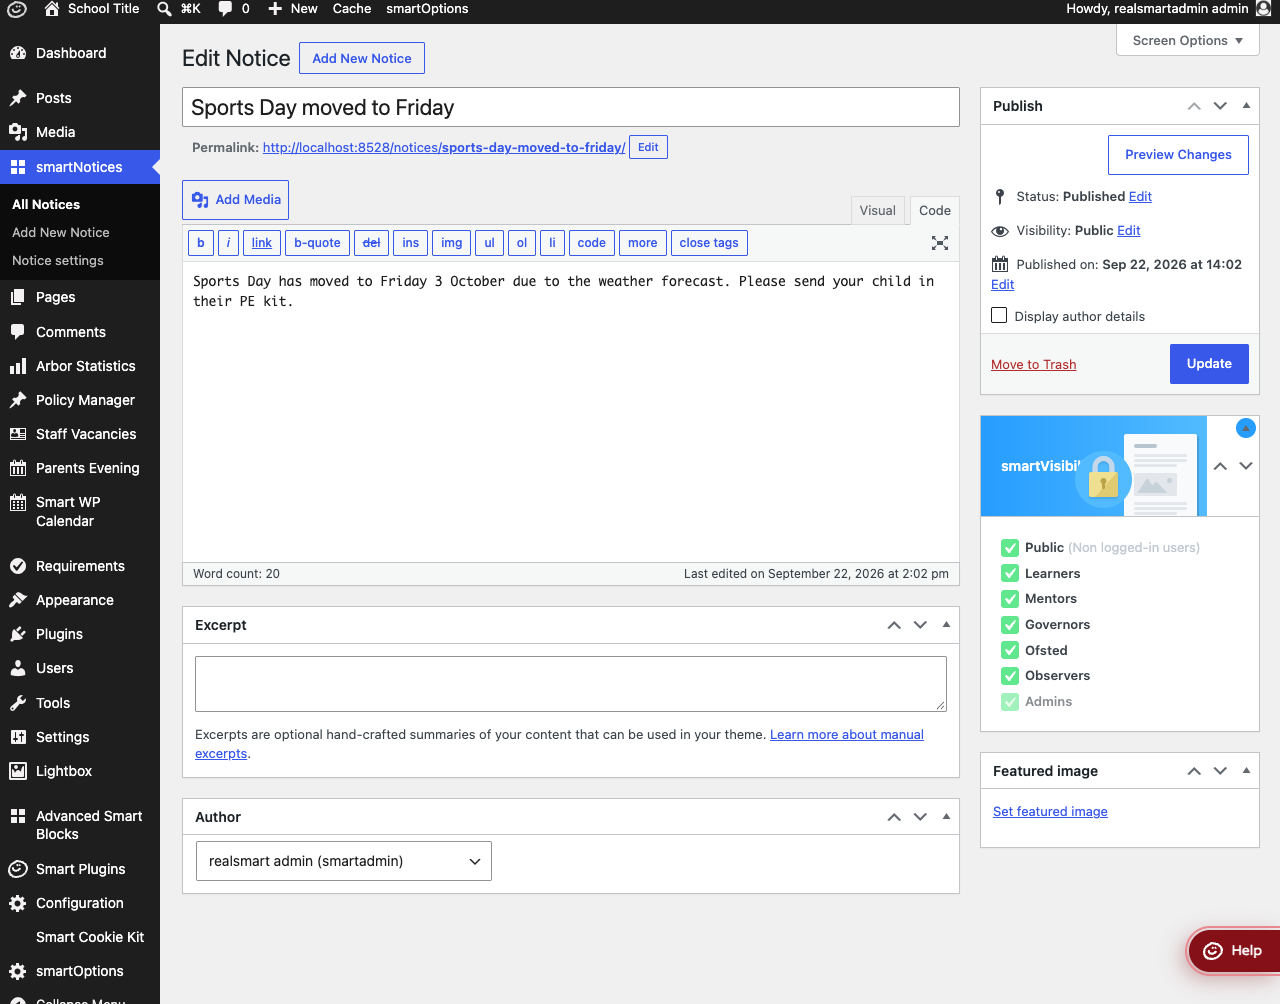
On the notice board, each notice shows its title, the first part of its text and a read more link to the full notice. If you fill in the Excerpt box, that is used instead of the start of the notice text.
If Smart Visibility is also active, you will see a smartVisibility panel on this screen too, letting you restrict which visitor types see this particular notice — see the Smart Visibility guide.
Step 3: Check it appears on the homepage
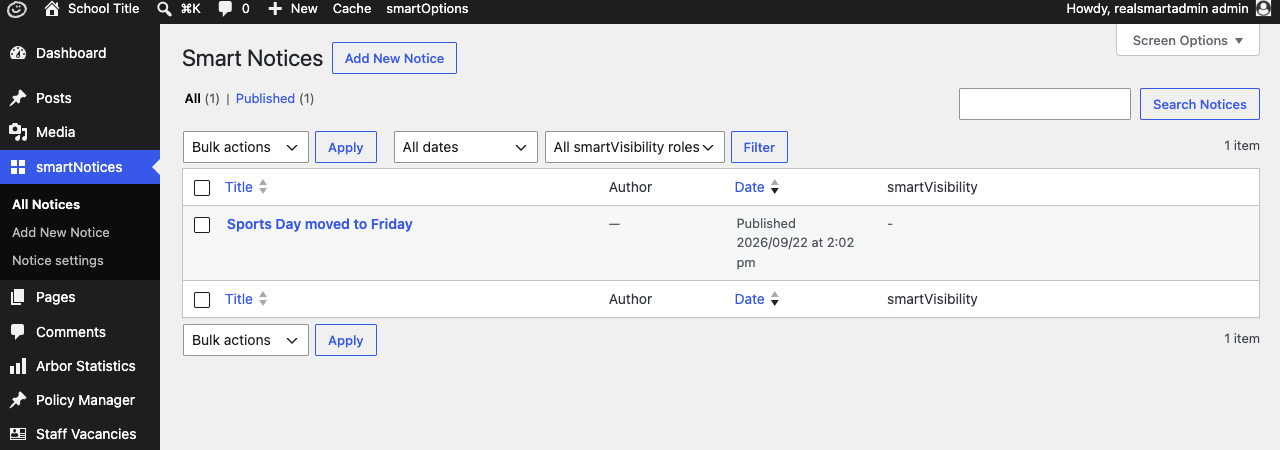
Your notice is listed under Smart Notices → All Notices. Notices show on the homepage automatically — visit your website to confirm it appears there. The board shows your most recent published notices, newest first, up to the Number of notices set on the settings page.
Step 4: Show notices on another page (optional)
Edit the page, and in the smartNotices panel in the sidebar, tick Display smartNotices on this page?. Update the page. This option only appears when editing a page — not a post.
Step 5: Adjust the layout and style
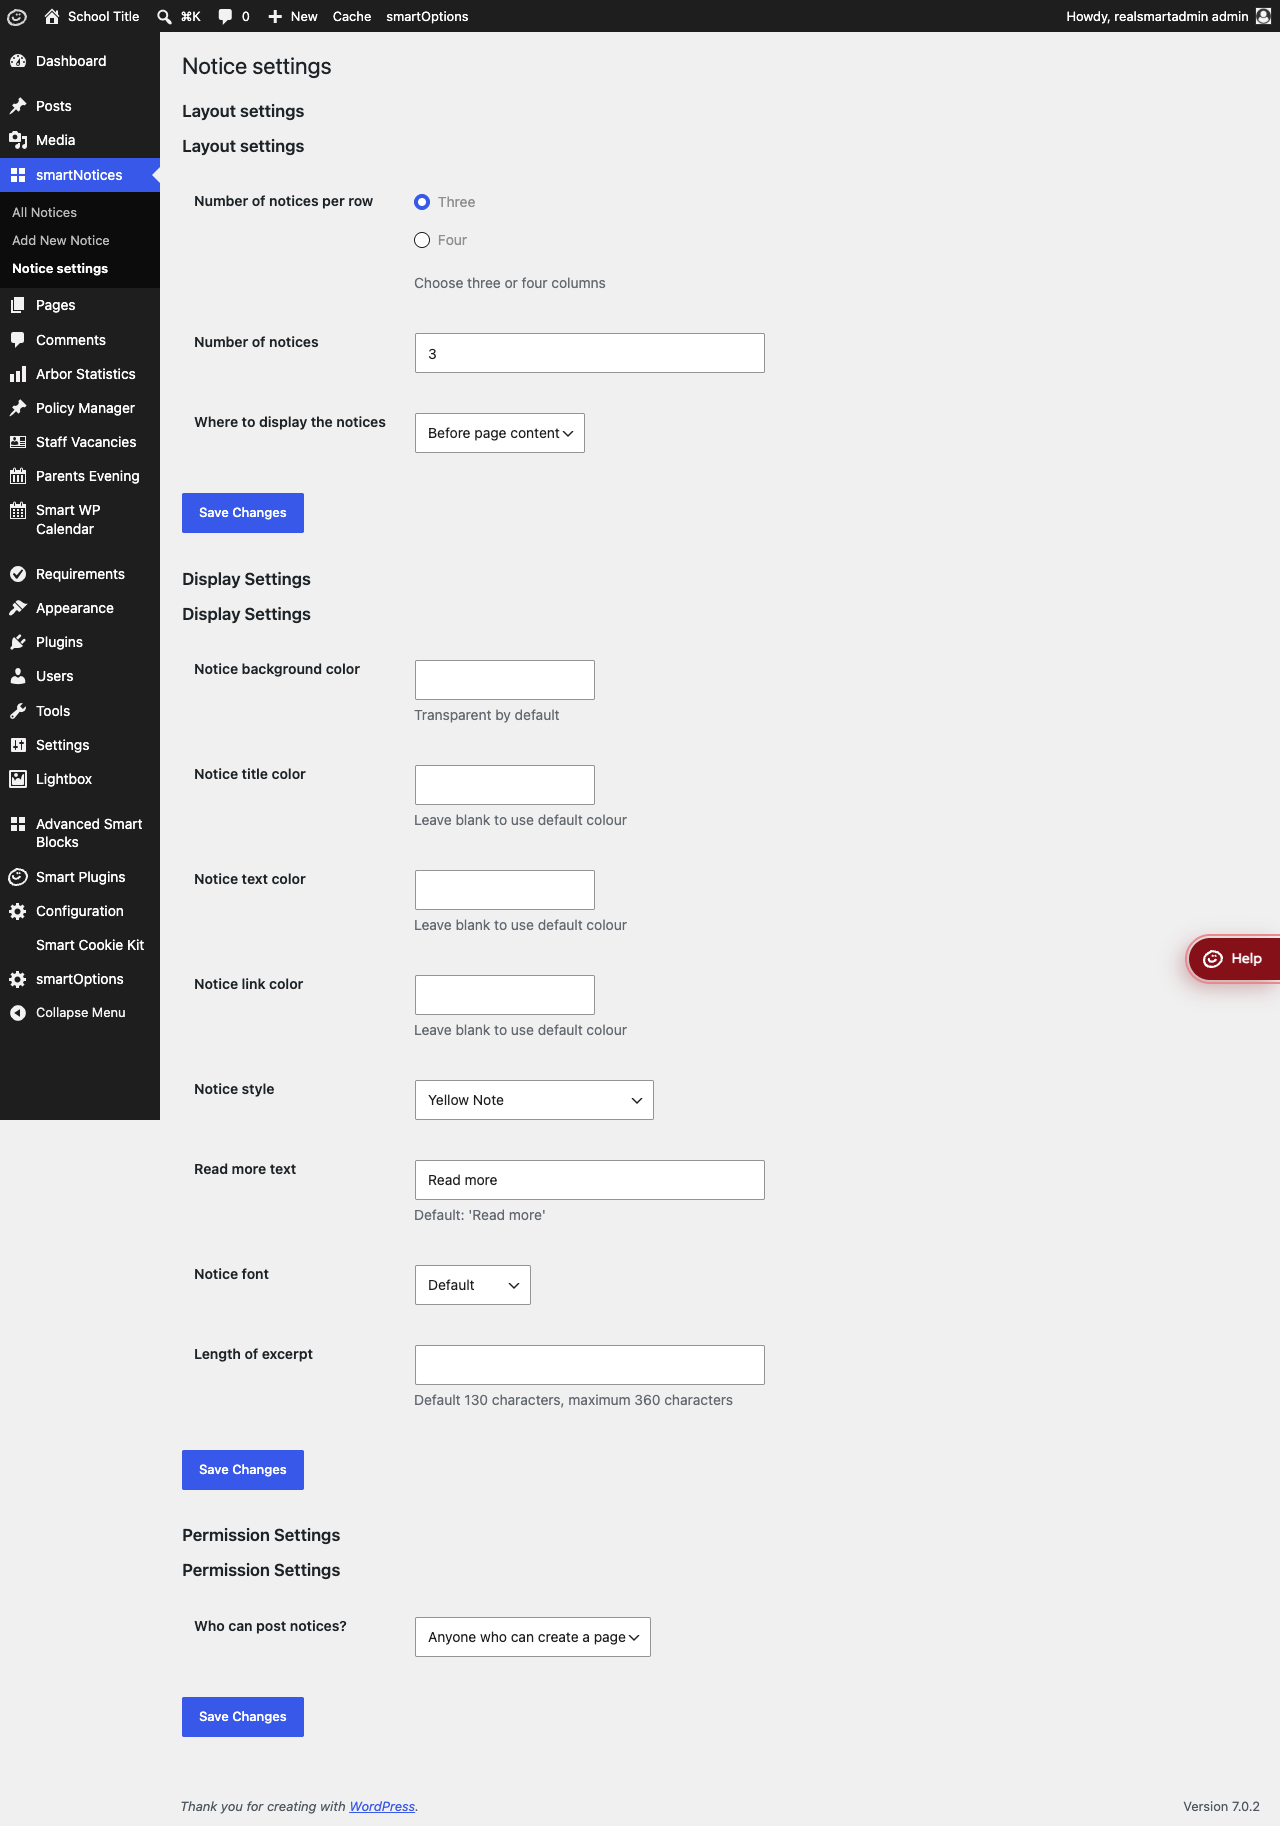
Go to Smart Notices → Notice settings to change how many notices show, how many columns, and the visual style. Only administrators see this page.
The page has three sections — Layout settings, Display Settings and Permission Settings — each with its own Save Changes button. Save each section before changing the next one, as a button only saves the section above it.
Settings
Where to find it: Smart Notices → Notice settings
Layout settings
| Setting | What it does | Default |
|---|---|---|
| Number of notices per row | Three or four columns | Three |
| Number of notices | Maximum notices shown at once | 3 |
| Where to display the notices | Before page content, or within page content | Before page content |
Display Settings
| Setting | What it does | Default |
|---|---|---|
| Notice background color | Notice background colour | Transparent |
| Notice title color | Notice title colour | Uses the theme's default |
| Notice text color | Notice body colour | Uses the theme's default |
| Notice link color | Colour of the "read more" link | Uses the theme's default |
| Notice style | Yellow Note, iOS Style, or None (background colour only) | Yellow Note |
| Read more text | Label on the read more link | Read more |
| Notice font | Default, or Hand drawn | Default |
| Length of excerpt | Number of characters of each notice's text shown before the read more link. The hint on the page suggests no more than 360 | 130 (when left blank) |
Permission Settings
| Setting | What it does | Default |
|---|---|---|
| Who can post notices? | Anyone who can create a page, or anyone who can create a post | Anyone who can create a page |
Where notices appear
A notice board shows up in three cases: on the homepage, always; on any other page where you have ticked Display smartNotices on this page?; and on a category's archive page, if you have set that on the category's own edit screen (a smartNotices dropdown there, set to Yes).
Troubleshooting
Notices are not appearing on a page
- Confirm at least one notice is published under Smart Notices → All Notices.
- If this is not the homepage, edit the page and confirm Display smartNotices on this page? is ticked. This option is only available on pages, not on posts.
- For a category archive, check the smartNotices setting on that category's edit screen is set to Yes.
A member of staff cannot add a notice
Check Who can post notices? under Permission Settings. If it is set to "Anyone who can create a page", only people with page-editing permissions can add notices — switch it to "Anyone who can create a post" to include everyone who can write a post instead.
A settings change did not stick
Each section of Notice settings saves separately. If you changed fields in more than one section and then selected one Save Changes button, only that section was saved — make the other change again and use the Save Changes button directly beneath it.
Did this work for you?
If a step looked different on your site, tell us and we'll update the screenshots.
Thanks for your feedback.