All guides / Content-publishing
Smart Blocks
Overview
Smart Blocks adds a row of clickable tiles below the page header — for example "Term Dates", "Parent Portal" and "School News" on your homepage. Each of the eight available blocks has its own title, description, link, image, background colour and width, so you can build anything from three even tiles to a mixed row of different sizes.
Only Administrators can open the Smart Blocks settings screen. Smart Blocks itself has to be switched on for your site before the settings screen or the blocks will appear anywhere.
Getting set up
Step 1: Turn on Smart Blocks
Go to Smart Plugins in the WordPress sidebar and switch Smart Blocks on. It is off by default. If you can't see a Smart Blocks item under Smart Plugins, this is why.
Step 2: Open the Smart Blocks settings
Go to Smart Plugins → Smart Blocks.
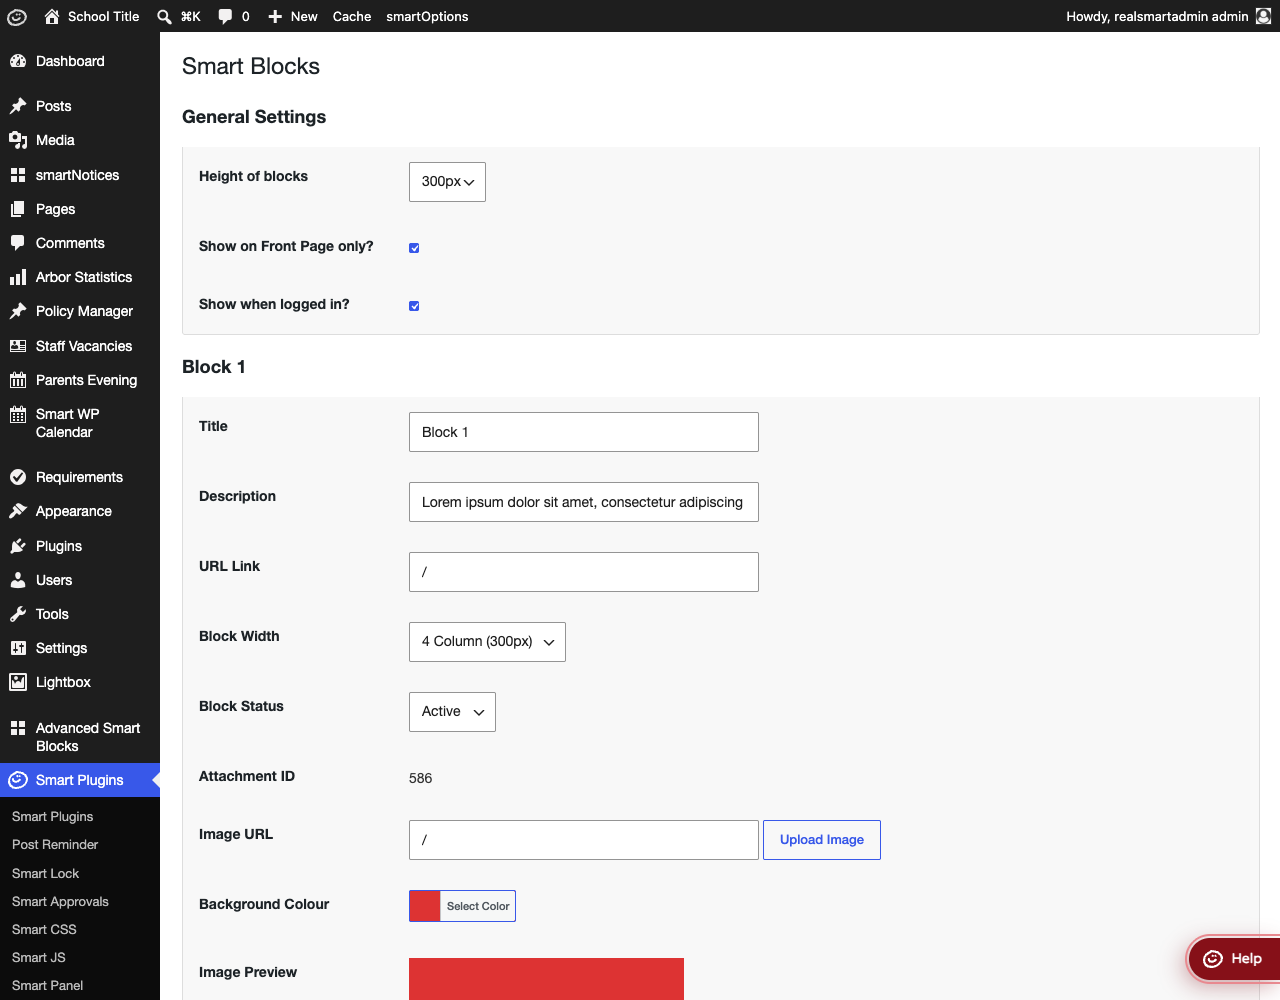
Step 3: Choose the general settings
- Height of blocks — pick a fixed pixel height for every tile.
- Show on Front Page only? — tick to show blocks only on the homepage; untick to show them on every page.
- Show when logged in? — tick to also show blocks to signed-in staff and pupils.
Step 4: Set up a block
For each block you want to use (Block 1 through Block 8):
- Enter a Title and, optionally, a Description.
- Enter the URL Link the tile should go to.
- Choose a Block Width — the widths of the blocks in a row should add up to 12 for an even row (for example, three blocks at width 4, or four blocks at width 3).
- Click Upload Image to pick a picture from the media library, or paste a direct Image URL.
- Pick a Background Colour with Select Color — the tile shows this colour when it has no image. An image is stretched to cover the whole tile.
- Set Block Status to Active.
Step 5: Save and check the site
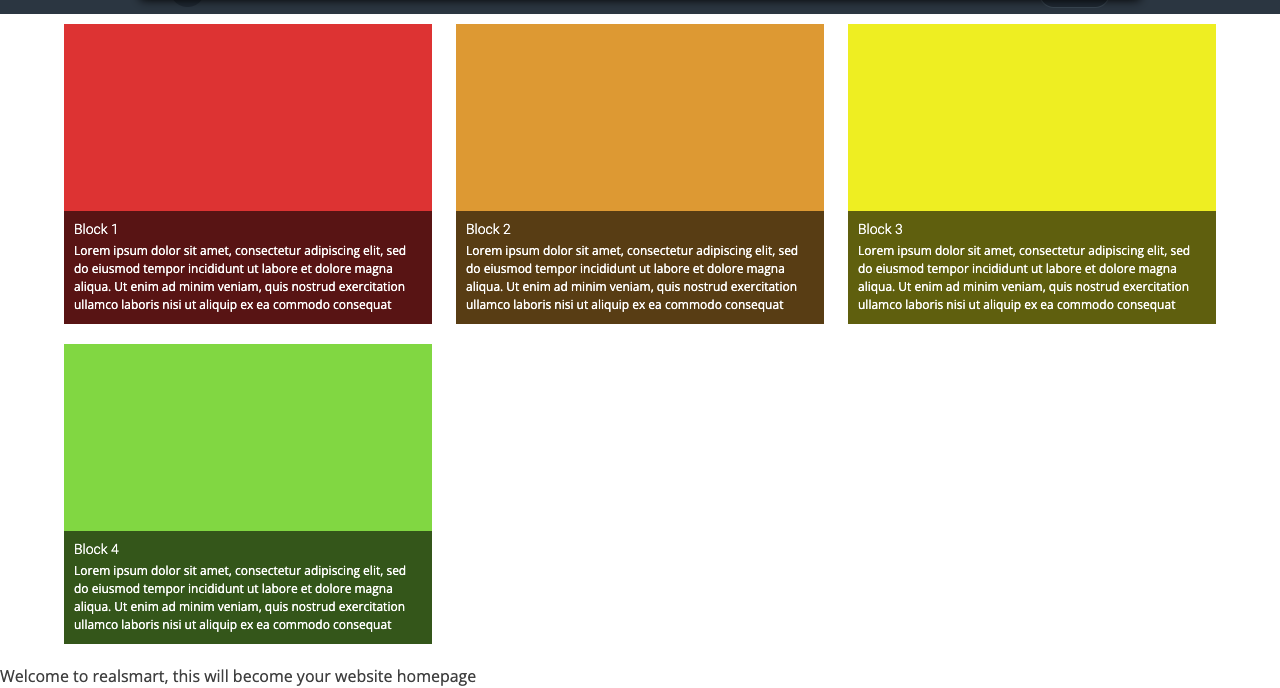
Click Update Blocks, then visit your website to see the blocks appear below the header. Each tile's title and description sit in a dark strip along the bottom of the tile. On phones the tiles stack one above the other.
Settings
Where to find it: Smart Plugins → Smart Blocks
General settings
| Setting | What it does | Default |
|---|---|---|
| Height of blocks | Block height in pixels | 140px |
| Show on Front Page only? | Only display blocks on the homepage | On |
| Show when logged in? | Also show blocks to signed-in staff and pupils | Off |
Per-block settings (Block 1–8)
| Setting | What it does | Default |
|---|---|---|
| Title | Block heading | Empty |
| Description | Supporting text | Empty |
| URL Link | Where the block links to. Leave empty for a non-clickable tile | Empty |
| Block Width | Grid width, 1–12 columns (12 fills the row) | 3 Column (220px) |
| Block Status | Active or Inactive — only Active blocks show on the site | Inactive |
| Attachment ID | Set automatically when you use Upload Image to pick a picture from the media library | Empty |
| Image URL | A direct image address. Upload Image fills this in for you; it is used when there is no media library image picked | Empty |
| Background Colour | The tile's colour when it has no image (an image covers the whole tile) | #FFFFFF |
| Image Preview | A preview of how the block will look. It updates as you change the title, description, width, height, colour or image | — |
Only blocks with Block Status set to Active appear on the site. An Active block with no title and no description still shows, as a plain tile with no caption.
Troubleshooting
Blocks are not appearing anywhere
Why it happens: Smart Blocks may not be switched on for your site, no block may be set to Active, you may be signed in while Show when logged in? is unticked, or you may be viewing a page other than the homepage while Show on Front Page only? is ticked.
How to fix it:
- Confirm Smart Blocks is switched on under Smart Plugins.
- Check that at least one block has Block Status set to Active, then click Update Blocks.
- If you're testing on a page other than the homepage, untick Show on Front Page only?, or view the homepage instead.
Blocks disappear when you sign in
Why it happens: Show when logged in? is unticked, so blocks are hidden from signed-in staff and pupils by design — visitors who aren't signed in still see them.
How to fix it: Tick Show when logged in? and click Update Blocks if you want signed-in users to see the blocks too.
A block's image is not showing
Why it happens: Neither the Attachment ID (set via Upload Image) nor a direct Image URL has been set, or the attachment is not an image file.
How to fix it:
- Click Upload Image and choose a picture from the media library.
- If you'd rather link to an image hosted elsewhere, paste its address into Image URL instead.
- Check the Image Preview field after saving to confirm the picture loaded.
Did this work for you?
If a step looked different on your site, tell us and we'll update the screenshots.
Thanks for your feedback.