Set up Active Directory sync
On-prem Active Directory works differently from Google and Entra. Instead of Realsmart reaching out to a cloud service, you install a small connector app on a Windows Server at your school. That app pulls the user data Realsmart has prepared for your school and applies it to your local Active Directory. It links to Realsmart using your School ID and a secret connector token.
This page walks the core install. There is also a fuller, external step-by-step guide linked from the page (and in step 5) if you want more depth — but the steps below stand on their own.
Before you start
- You must be a school admin with sync settings permission, with the school selected in the switcher.
- Turn Active Directory on first under School settings → Sync services — enabling it is what generates your connector token. See Enable or disable sync services.
- You need access to a Windows Server on your school network that can reach your domain controllers, and permission to install and run software on it.
Steps
Step 1: Check the server prerequisite (.NET 6)
The connector needs at least .NET 6 installed on the server you will run it on. If it isn't already there, install it from Microsoft's .NET downloads page (the app's getting-started screen links to it directly). Without .NET 6 or later, the connector will not start.
Step 2: Download the AD sync application
On the Active Directory — getting started page, select Download a copy of the AD sync application. This downloads a zip file containing the connector.
Step 3: Turn on test mode, then unzip and run adsync.exe
IMPORTANT — before your first run, turn on Test mode in Active Directory settings (General section). In test mode, the export appends _tst to every username, email address and OU path it produces, so any objects the connector creates from that run are unmistakably test data — easy to find and clean up if something isn't right, rather than mixed in with your real accounts. Turn test mode off once you're happy with a test run and ready to go live.
Copy the downloaded zip onto your Windows Server and unzip it there. In the unzipped folder, right-click adsync.exe and select Run as administrator — the connector needs administrator rights to run correctly. If Windows shows a security warning ("Windows protected your PC"), select More info, then Run anyway, to proceed. Then follow the on-screen instructions.
Step 4: Enter your School ID and connector token
When the app prompts for them, enter the two values shown on the Active Directory — getting started page:
- School ID — your school's numeric ID.
- Connector token — the secret token that authenticates this connector to Realsmart. On the page it is shown masked; use Reveal to see it and Copy to copy it, then paste it into the app. Treat it like a password — keep it secret.
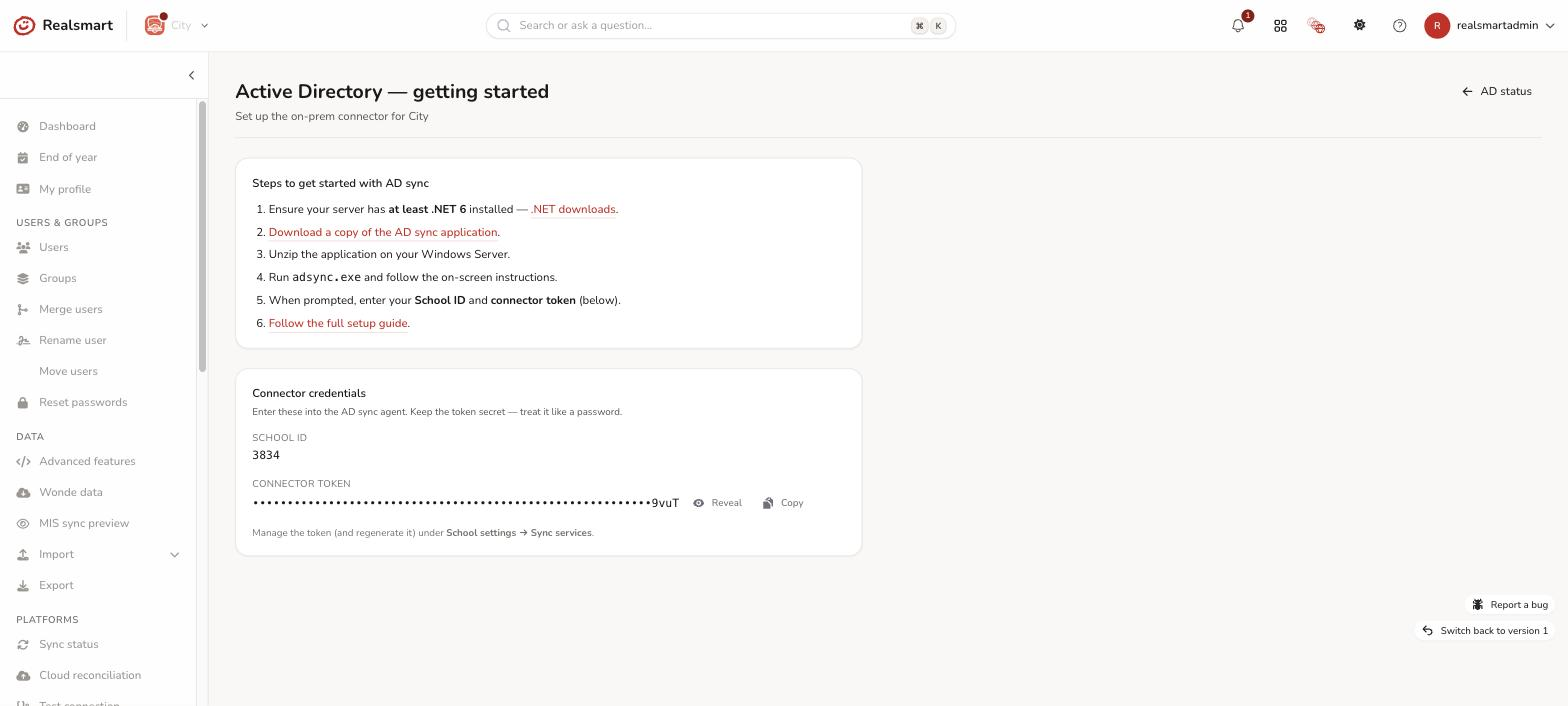
Both values are on that page together, so keep it open while you configure the app.
Step 5: Finish setup and verify
Complete the on-screen setup. Once the connector is running and linked, you can:
- Check exactly what it will write using Preview the Active Directory export.
- Fine-tune where accounts are placed and how they're named in Active Directory settings.
- Follow the full setup guide linked on the page for advanced scenarios (multiple domains, scheduling, service accounts, and troubleshooting the connector itself).
After a run, the connector reports back and a confirmation email goes out to the Technician email address set under School settings → Details → School contacts → Technical. Make sure that address is current so someone actually sees the notification.
Managing the token later
The connector token is managed under School settings → Sync services, where you can Reveal, Copy, or Regenerate it. Regenerating immediately invalidates the old token, so if you regenerate you must update the connector app with the new value or its sync will stop working. See Enable or disable sync services.
Related
Did this work for you?
If a step looked different on your site, tell us and we'll update the screenshots.
Thanks for your feedback.